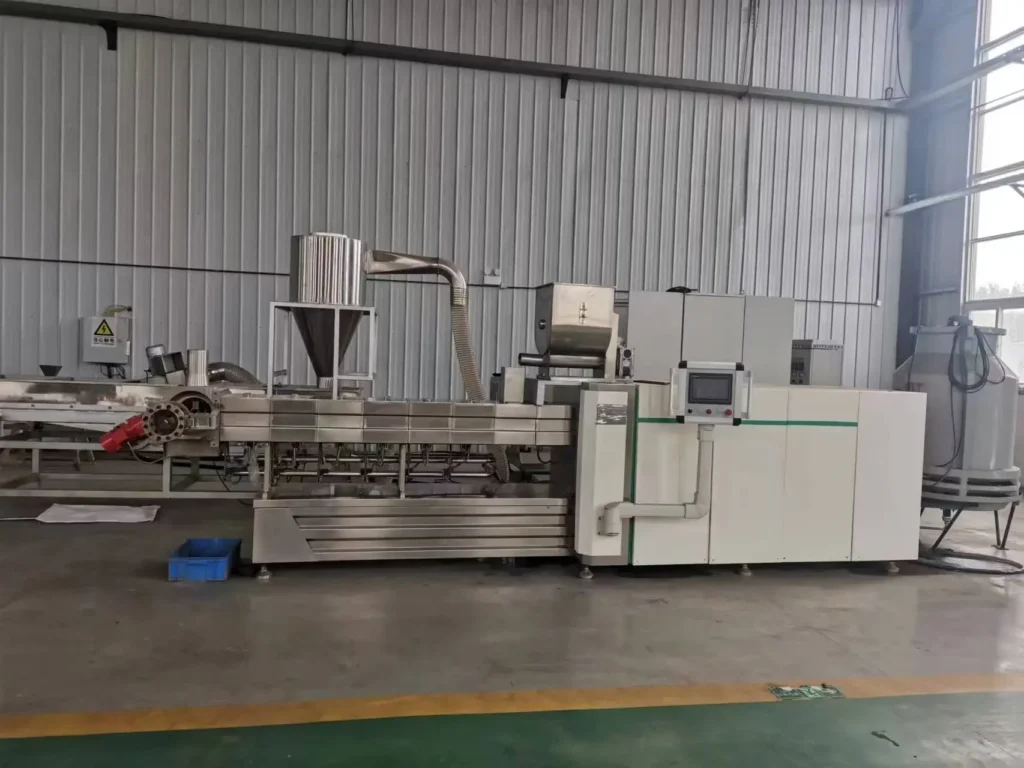

More kneading blocks do not guarantee better pet food quality; they can easily burn high-meat recipes.
Optimizing the screw configuration pet food extrusion setup by balancing kneading and conveying elements based on specific meat inclusion percentages is the only reliable way to achieve proper gelatinization while preventing material slippage and over-shearing.
Years ago, while sourcing equipment at a trade show in Chicago, I took a shortcut and ordered a cheap twin-screw machine. The default setup was heavily loaded with conveying elements and lacked sufficient kneading blocks. When we tried running a high-meat pet food formula, the material simply slipped through the barrel. Gelatinization was practically nonexistent, and the entire batch was ruined. We had to bring in engineers to completely reconfigure the screws. After that costly lesson, I transitioned to the machinery manufacturing sector in Jinan, focusing on sales. Today, whenever I discuss setups with international buyers, the very first question I ask is about their formula’s meat content. Buying equipment based solely on price tags is a trap; if the ratio of kneading to conveying elements is miscalculated, even the most expensive machine becomes useless scrap. Understanding the friction and shear mechanics in twin-screw extrusion for high-protein diets is essential to avoid repeating this mistake.
Let us break down how to master this balance and avoid production disasters.
Why Does Material Slippage Occur in High-Meat Extrusion?
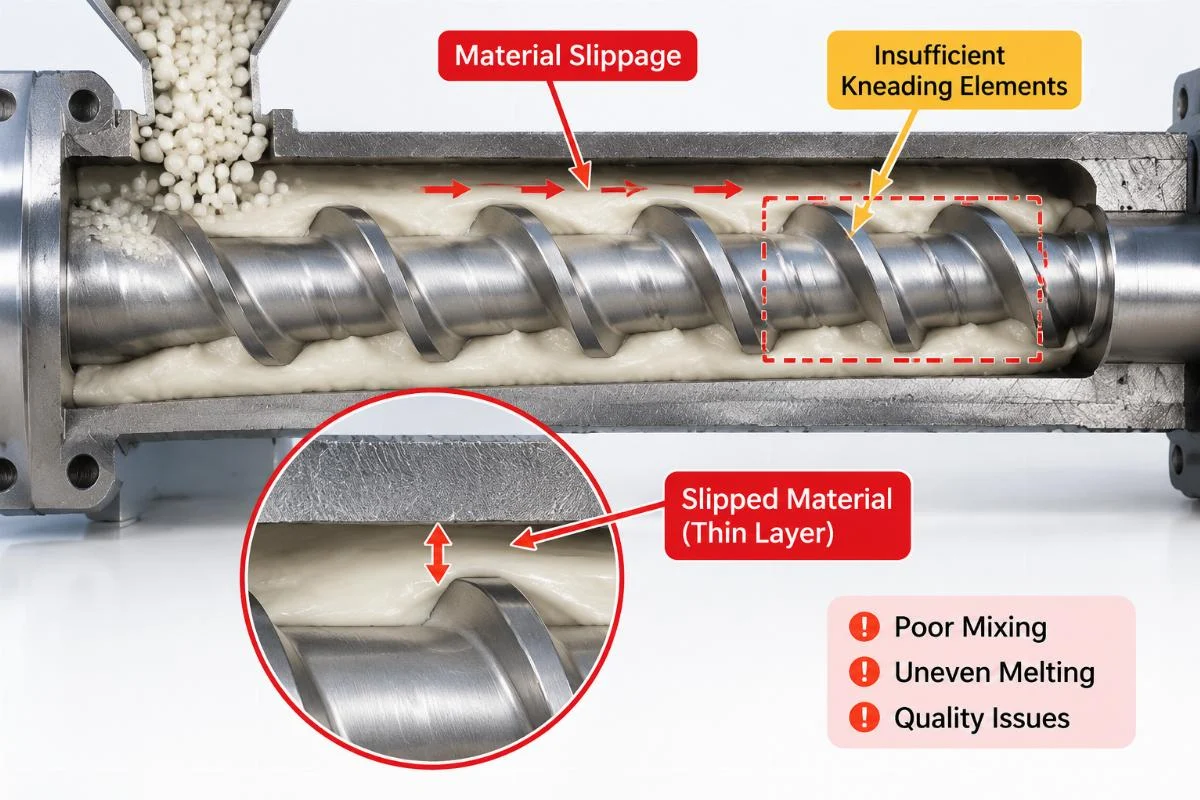
Material slippage in high-meat extrusion is primarily caused by an over-reliance on conveying elements, which fail to generate the necessary friction and shear to move sticky, protein-rich dough.
When formulating with substantial meat inclusion, the physical properties of the dough change dramatically. Meat proteins behave differently than standard cereal starches; they require intense mechanical work to break down muscle fibers and properly denature the proteins. If your screw profile consists mostly of standard conveying elements, the material simply rides along the smooth surface of the barrel without being adequately mixed or heated. The material slip mechanisms in high-moisture protein extrusion dictate that without aggressive kneading, the dough acts like a lubricated solid plug.
I once consulted for a startup in North America that was struggling with a new high-protein recipe. Their output was erratic, and the final product was completely raw in the center. Upon inspecting their screw profile, we found that the manufacturer had supplied a default, starch-optimized configuration. The conveying sections were excessively long, while the kneading zones were minimal. The material was being pushed forward too quickly, bypassing the necessary shear zones. By removing several conveying elements and replacing them with staggered kneading blocks, we increased the residence time and friction, completely eliminating the slippage issue.
How to Calculate the Ideal Kneading-to-Conveying Ratio?
Calculating the ideal ratio requires matching the element sequence strictly to the specific meat inclusion percentage and the desired specific mechanical energy input.
There is no universal screw profile for all pet foods. The screw configuration pet food extrusion process demands a tailored approach based on the exact formulation. To determine the correct balance, you must evaluate the specific mechanical energy input targets for varying protein levels.
Here is the systematic approach to adjusting your profile:
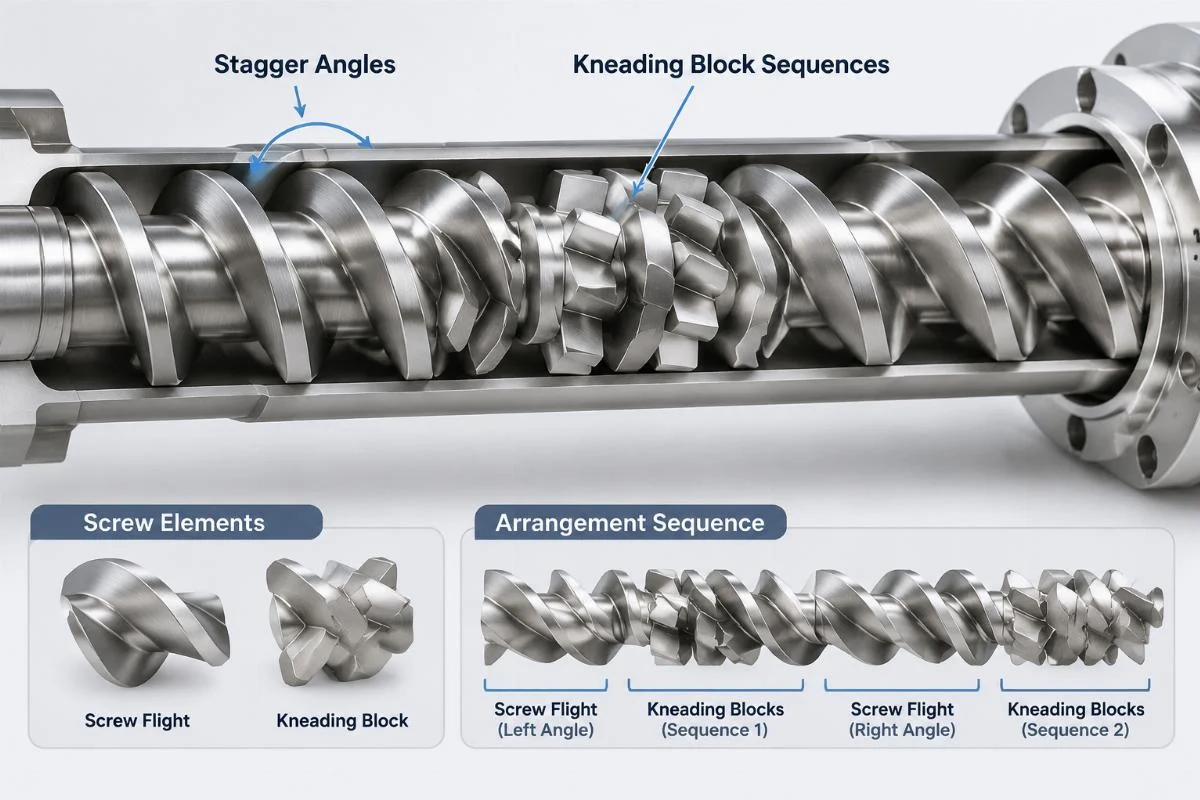
- Assess the Meat Inclusion Level: For formulas with minimal meat, standard conveying elements dominate to ensure high throughput. As meat content rises, the proportion of kneading blocks must increase proportionally to handle the denser, stickier matrix.
- Select Kneading Block Stagger Angles: The stagger angle of the kneading discs dictates the severity of the shear. Wider angles create more forward conveyance with moderate shear, while narrower angles generate intense shear and backward mixing, significantly increasing residence time.
- Balance the L/D Ratio: The overall length-to-diameter ratio must be optimized to ensure uniform heat transfer. A longer effective length allows for a more gradual transition from conveying to intense kneading, preventing sudden thermal spikes.
The following matrix illustrates the qualitative adjustments needed based on formulation density:
| Formulation Density | Kneading Intensity | Conveying Capacity | Expected Thermal Profile |
|---|---|---|---|
| Low Meat / High Starch | Basic | Full | Rapid heat absorption |
| Medium Meat Blend | Standard | Balanced | Controlled shear heating |
| High Meat Inclusion | Intense | Restricted | High friction, extended residence |
Adjusting the screw configuration pet food extrusion setup in this manner ensures that the mechanical energy is perfectly matched to the rheological properties of the dough.
What Are the Signs of Over-Shearing vs. Under-Gelatinization?
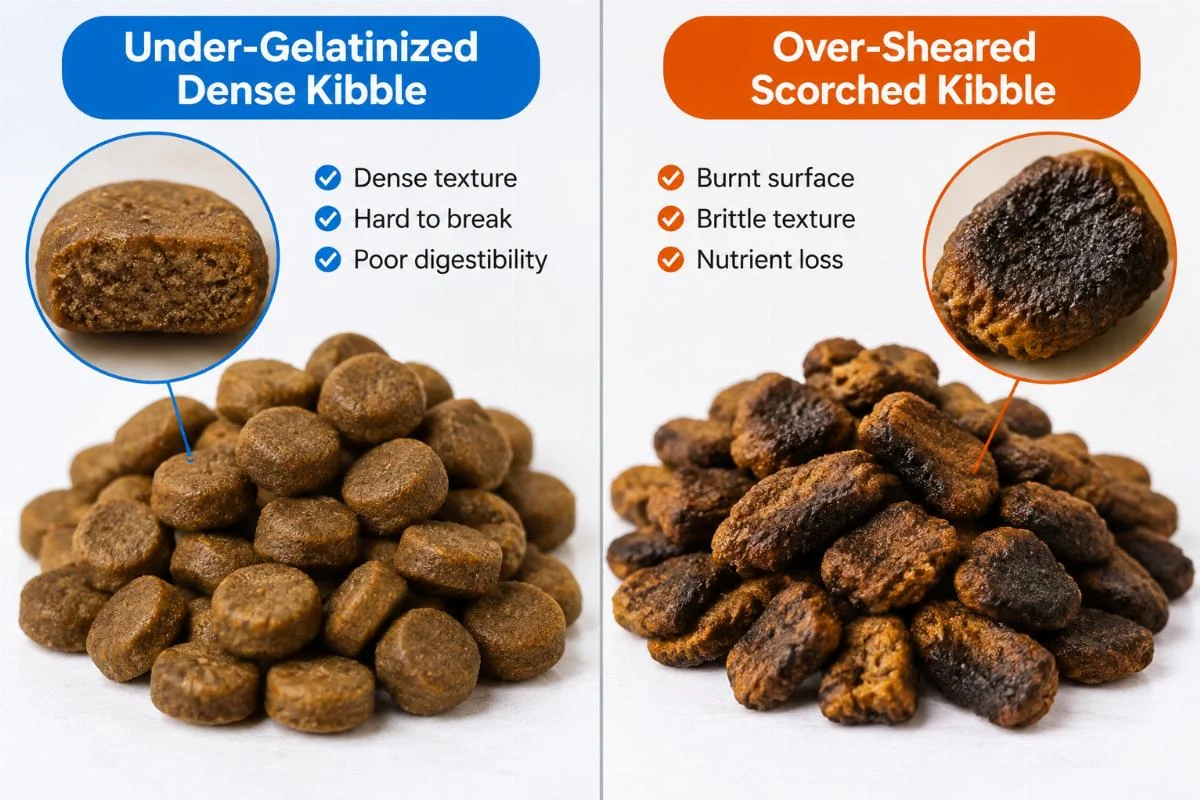
Visual and textural defects in the final kibble are direct indicators of an incorrect kneading block configuration, revealing whether the material suffered from excessive friction or insufficient mechanical work.
Identifying the root cause of a bad batch requires careful observation of the extrudate. The sensory evaluation protocols for extruded pet food kibble provide clear markers for both extremes.
Signs of Under-Gelatinization:
If the product appears pale, lacks the characteristic porous structure, and feels excessively dense or hard, you are likely under-gelatinizing. This happens when the conveying elements overpower the kneading blocks. The material passes through the barrel too quickly, failing to reach the necessary temperature and pressure for starch gelatinization and protein denaturation. In a recent project with a contract manufacturer in Europe, their high-meat treats were sinking in water instead of floating, and the texture was leathery. The profile lacked the necessary kneading zones to build up the internal pressure required for proper expansion.
Signs of Over-Shearing:
Conversely, if the kibble is scorched, exhibits dark brown or black specks, and has a brittle, overly expanded structure, you are over-shearing. This occurs when there are too many narrow-angle kneading blocks or when the sequence is placed too early in the barrel. The intense friction generates localized thermal degradation, literally burning the high-meat recipe. A client in South America faced this issue; their premium meat formula kept developing a burnt flavor and dark streaks. By reducing the number of kneading blocks and introducing more conveying elements to move the material through the high-shear zone faster, we eliminated the scorching while maintaining adequate gelatinization.
How to Validate Your Screw Profile Before Full Production?
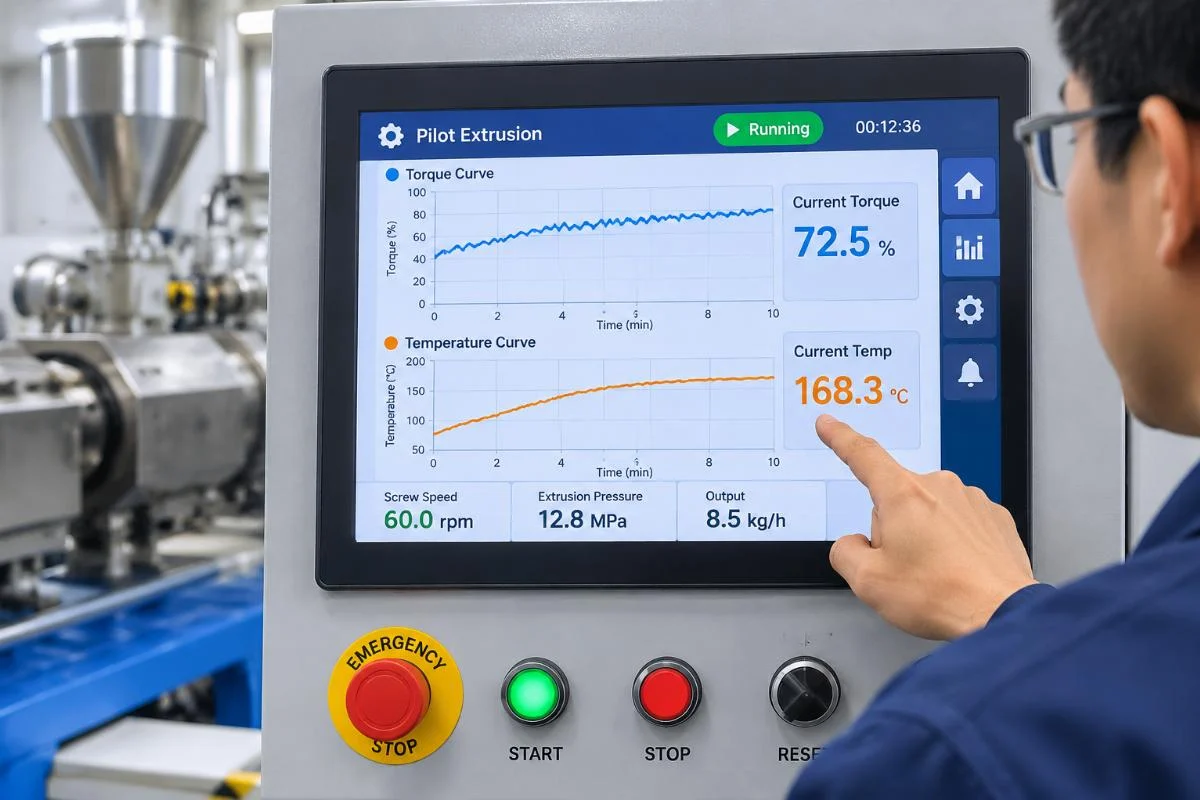
Validating your screw profile requires conducting small-batch trials and meticulously monitoring torque and temperature curves to ensure the mechanical energy aligns with the formulation’s limits.
Never commit to a full production run with an untested screw configuration pet food extrusion setup. The pilot-scale validation methods for twin-screw extruder profiles are critical for mitigating financial risk.
Follow this validation protocol:
- Run Small-Batch Trials: Use a laboratory or pilot-scale extruder with the exact same screw profile geometry planned for the main production line. Process a limited quantity of your high-meat formula.
- Monitor Torque Curves: Torque is the direct reflection of the viscosity and friction inside the barrel. A steady, moderate torque indicates a balanced profile. Spiking torque suggests the material is too viscous or the kneading is too severe, risking motor overload. Dropping torque indicates material slippage.
- Track Temperature Profiles: Compare the barrel temperature setpoints with the actual melt temperatures. If the actual melt temperature significantly exceeds the setpoints without external heating, the mechanical friction from the kneading blocks is too high.
- Evaluate the Extrudate: Check the bulk density, expansion ratio, and gelatinization degree of the pilot batch.
During a scale-up project for a new startup, we utilized this exact protocol. Their initial pilot run showed wildly fluctuating torque, indicating unstable material flow. By adjusting the sequence of the kneading blocks to create a more gradual pressure build-up, we stabilized the torque curve. This iterative testing phase saved them from a massive production failure and ensured a smooth transition to full-scale manufacturing. The turnkey line design and formula development support provided during this phase allowed the engineers to customize the screw profiles and provide on-site commissioning, perfecting the kneading-conveying balance before the first commercial batch was ever produced.
Conclusion
Mastering the screw configuration pet food extrusion process is the definitive factor in producing high-quality, high-meat pet food safely and efficiently. Balancing kneading and conveying elements prevents material slippage, avoids over-shearing, and ensures perfect gelatinization. Always validate your profile through rigorous pilot testing and adjust the element sequence based strictly on your specific meat inclusion levels.
Machines Mentioned in This Article

cat food machine
Pet Food Processing Equipment Plant Manufacturer Dog Food
View Machine
cat food machine
Dry Dog Food Production Line Pet Food Pellet Machine
View Machine
cat food machine
Pet Food Production Line Manufacturer
View Machine
cat food machine